An Ethereum/EVM/L2 Hardware Wallet (Raspberry Pi inside) with multi-L2 chain uniswap contract direct token Swap and physically hot-swappable private keys. NOT AUDITED. Do not use to store substantial quantities of funds.
Bringing the blockchain to physical life, using swappable private keys inside microSD cards, clicky buttons, open source code, and a bright informative display, this device makes for a great way to educate others, onboard, build, and swap tokens. No coding experience needed! Demonstration Videos: https://www.youtube.com/channel/UCEF_x9fTZcyoEAE-GllaJ8w
For $50 (+ cost of microSD cards) you can make your own! Load and gift small cold wallets to friends and family. Don't want the tax implications of sending your ETH? Just send USDC + gas. Hand the hardware to your 💘 crypto noob/student/child, they press and hold the physical button, it instantly routes a contract direct uniswap transaction to convert all the USDC to ETH(easily customize this swap to a token of your choosing)!
PART List: raspberry pi zero WH (needs header pins): https://www.pishop.us/product/raspberry-pi-zero-wireless-wh-pre-soldered-header/ (stock info) https://www.nowinstock.net/computers/developmentboards/raspberrypi/ ST screen: https://a.co/d/iT952LE microSD card for new private keys (smallest size and generic to reduce costs):https://a.co/d/50a2JCb microSD card reader with OTG (microUSB) adapter - https://www.amazon.com/dp/B096SGHJ4K?_encoding=UTF8&psc=1&ref_=cm_sw_r_cp_ud_dp_R4AX78ZPNXCDEEJW5CXM&newOGT=1 battery pack (optional) - https://a.co/d/fKbBJRV Want WalletConnect?: camera module (optional) -https://a.co/d/3tTFnJs
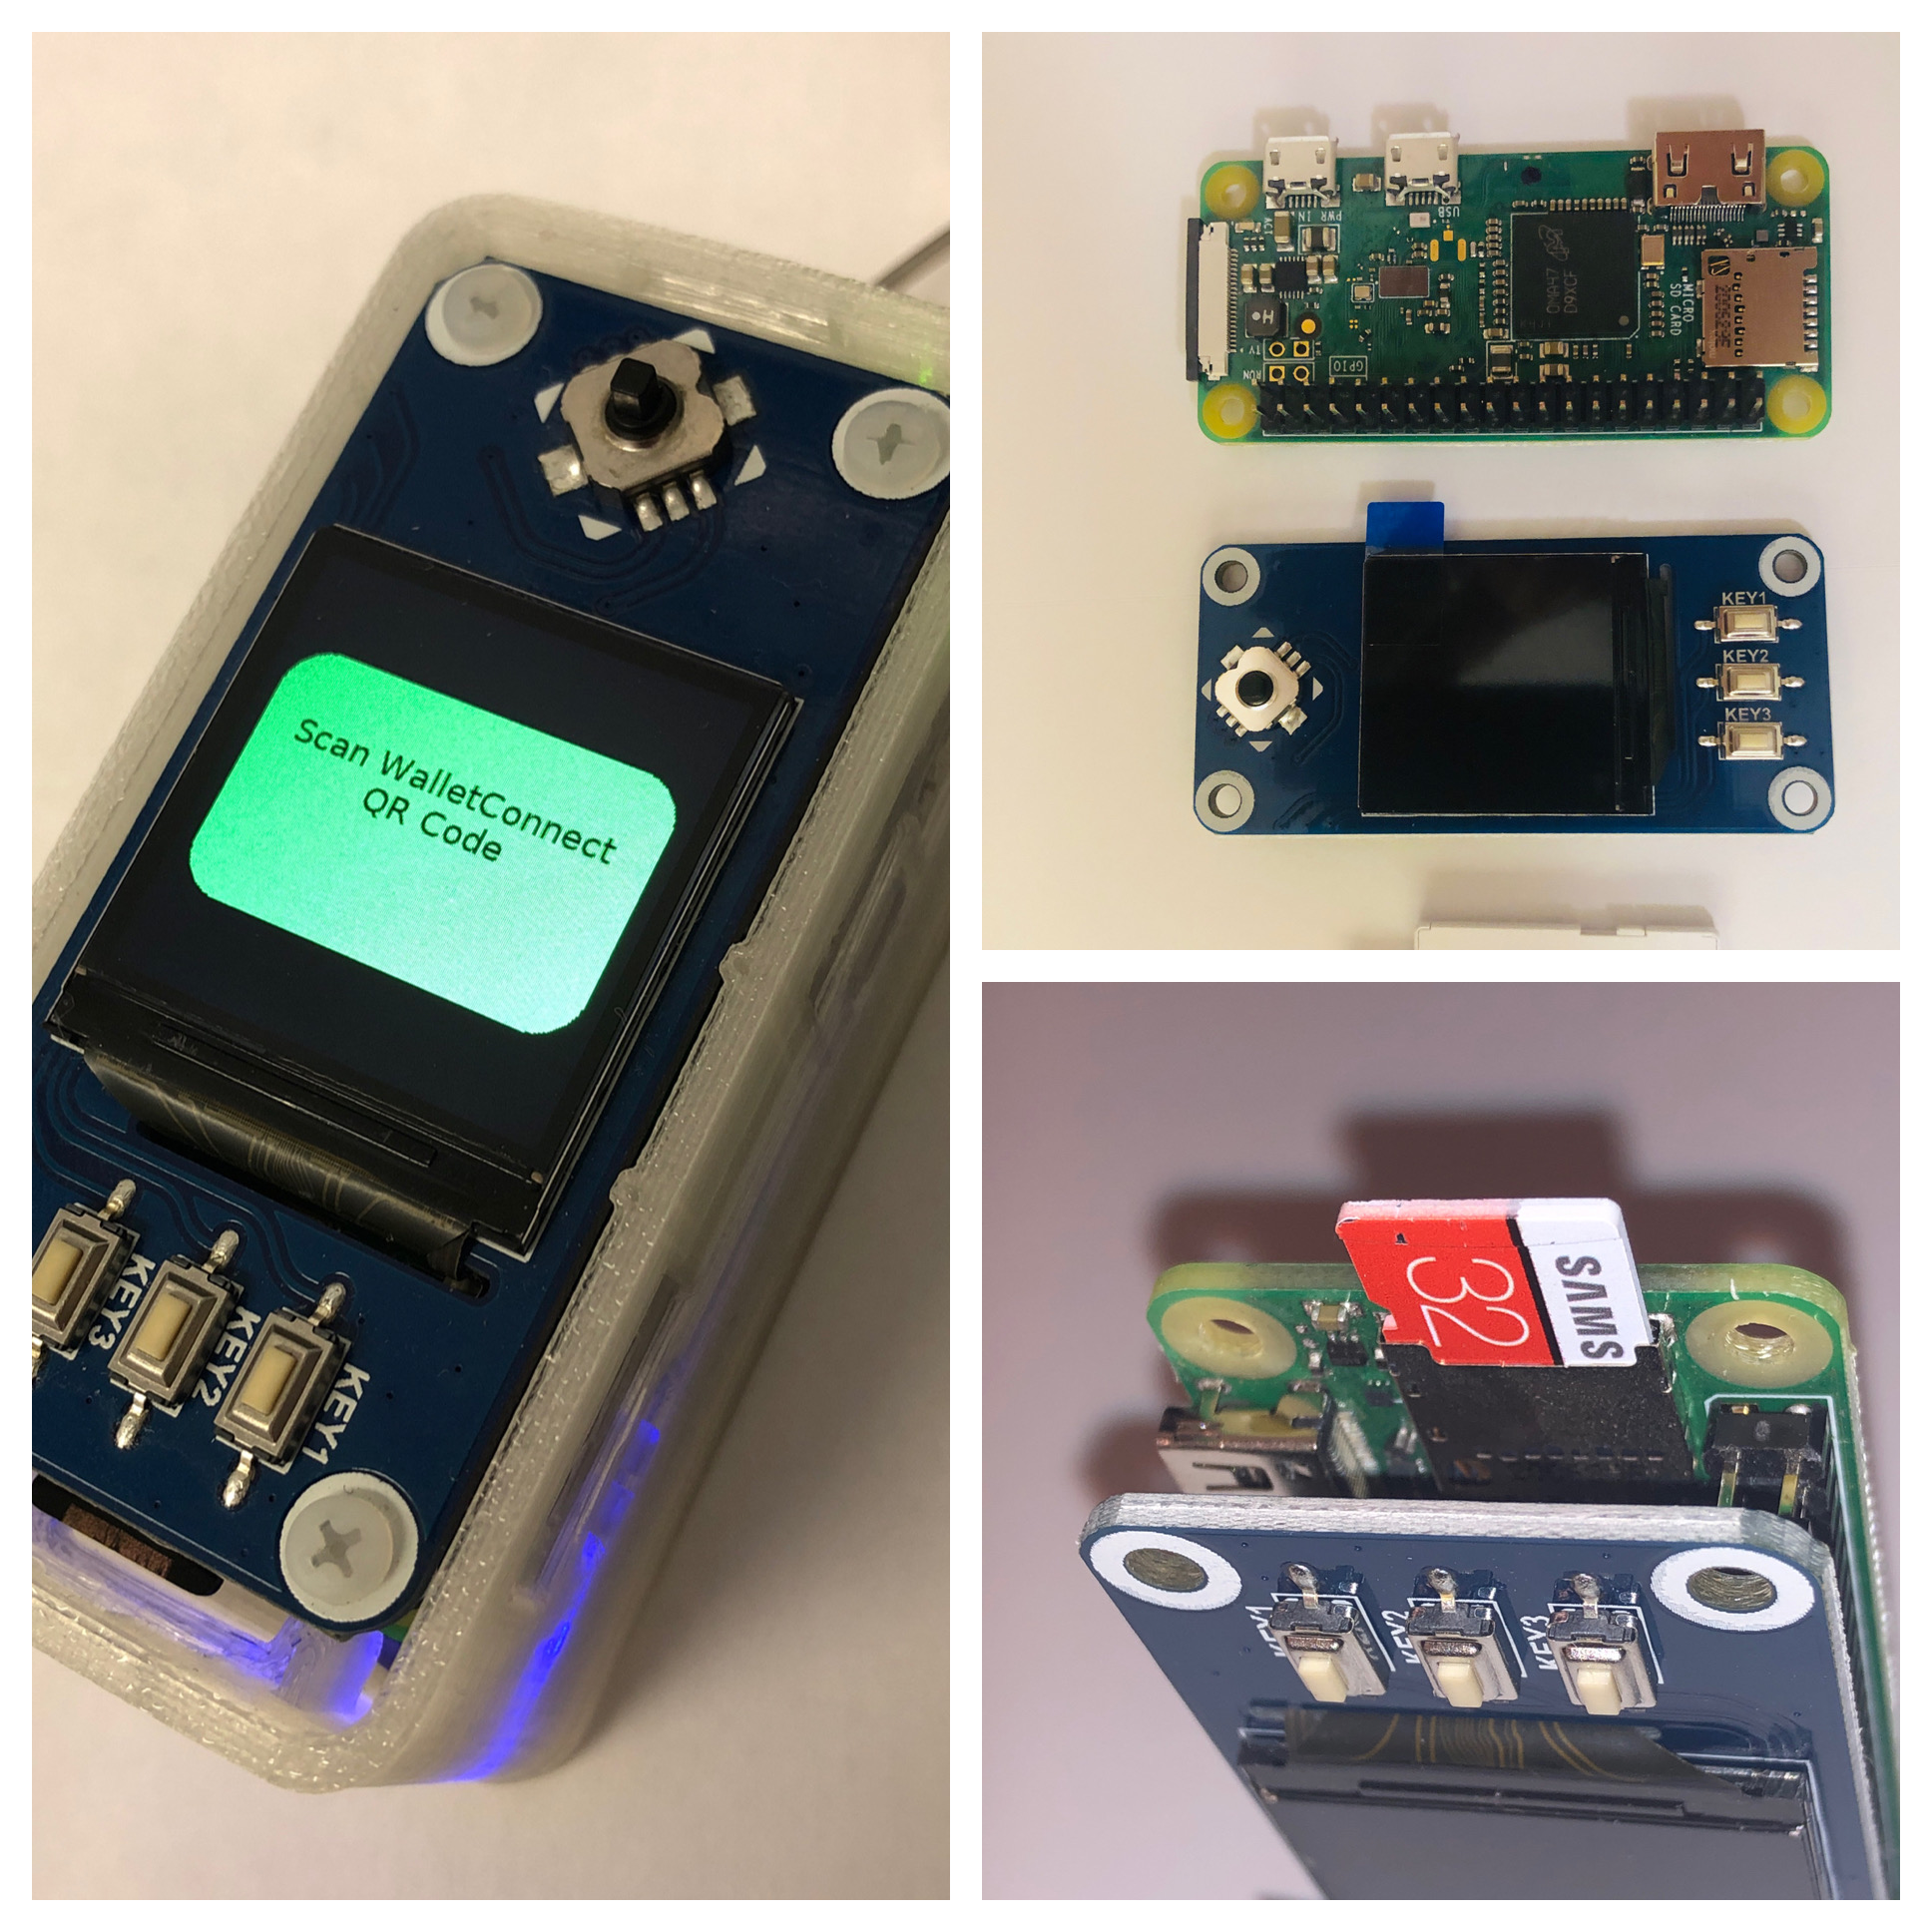

Plus there are a ton more buttons available to come up with your own essential wallet interactions!
✅ account signing? ✅ send an ETH transaction out? ✅ wallet watcher with custom alerts to phone? ✅ gas price watcher with alerts?
A) Basic Raspberry Pi Zero setup for NOOBS. start here if you have no clue what to do with your hardware or are very security minded. https://www.tomshardware.com/reviews/raspberry-pi-headless-setup-how-to,6028.html
OR if you want seamless wifi connectivity at every boot (best option)
B) Homebridge Raspberry Pi Zero setup: add a server for easy wifi connection when traveling around to peoples houses. You need a wifi or mobile phone hotspot connection for the wallet to work. https://homebridge.io/raspberry-pi-image
Use this disk imager to burn a copy of one of those operating system "images" onto a microSD card: https://sourceforge.net/projects/win32diskimager/
after above completed steps proceed below.
Make sure you have the following dependencies (modules) we build most modules in venv (virtual environment):
sudo apt-get update
or
sudo apt-get update --allow-releaseinfo-change

sudo apt-get -y install python3-pip
sudo apt install -y python3-lgpio

python3 -m venv ~/myvenv
source ~/myvenv/bin/activate
source ~/.bashrc
Install these libraries by running (only web3 version listed below works):
pip install st7789 pillow board gpiozero adafruit-blinka RPI.GPIO adafruit-circuitpython-rgb-display qrcode spidev eth-account
pip install lgpio
pip install web3==6.20.3
pip install uniswap-python

sudo apt install -y libopenblas-dev libatlas-base-dev
sudo apt-get install -y libopenjp2-7 python3-numpy

sudo usermod -aG gpio pi

Optional for walletconnect function (these are lengthy challenging installs on a pi zero, flash the provided image to skip) :
pip install imutils opencv-python-headless py?walletconnect

sudo raspi-config
--select interface
--enable SPI

reboot
Prerequisites (These instructions assume that your Raspberry Pi is already connected to the Internet, happily running pip and has Python3 installed)
If you are running the Pi headless, connect to your Raspberry Pi using ssh.
**I had to deactivate the included infura API as it was being spammed. Please generate your own free infura API number via the infura or alchemy websites and replace it in all the config.json file code. While you are at it, generate your own etherscan API, and polygon scan API, and any other L2 blockchain explorer API and replace those in the code.
Install & Run Copy the files from this repository onto the Pi, or clone using:
cd ~
git clone https://github.com/snarflakes/PiEthereumWallet.git
cd PiEthereumWallet
Run the PiSwapL2.py:
sudo -E /home/pi/myvenv/bin/python3 piswapL2.py
Any token pair from a uniswapV3 pool will work! Edit config.json file in each "L2 chain" directory. Make sure you update the infura API, token in and token out names, symbol, contract address, decimal place, API, and pool fee (ie 100, 300). Want more token pairs available? Add more config.jsons to the chain directory. config2.json, config3.json, config4.json etc.
In order to have a command or program run when the Pi boots, you can add it as a service. Once this is done, you can start/stop enable/disable from the linux prompt. Follow these instructions: https://domoticproject.com/creating-raspberry-pi-service/ Don't forget to add the activate myvenv code in the myscript file. create file (myscript.service) add code below and save in: etc/systemd/system. turn on: sudo systemctl enable myscript.service
[Unit]
Description=piswapL2
After=network.target

[Service]
Type=simple
User=root
Group=pi
Environment="PATH=/home/pi/myvenv/bin:/usr/local/sbin:/usr/local/bin:/usr/sbin:/usr/bin:/sbin:/bin"
Environment="PYTHONPATH=/home/pi/myvenv/lib/python3.7/site-packages"
WorkingDirectory=/home/pi/PiEthereumWallet
ExecStart=/bin/bash -c 'source /home/pi/myvenv/bin/activate && exec /home/pi/myvenv/bin/python3 piswapL2.py'
Restart=always

[Install]
WantedBy=multi-user.target
Change your user logon to be a very strong 10 digit password with symbol/upper/lowercase letter/numbers. Also you can reduce the rate of incorrect authentication attempts with https://www.fail2ban.org/wiki/index.php/Main_Page
Install free opensource software WireguardVPN by following instructions here: https://pivpn.io/
[camera first]
sudo apt-get install python3-opencv
sudo apt-get install libqt4-test python3-sip python3-pyqt5 libqtgui4 libjasper-dev libatlas-base-dev -y

##TURN ON CAMERA navigate through accessories on menu-
sudo raspi-config

[walletconnect function] (modules below are complex to install due to time/compute power of raspberry pi zero)
sudo apt-get install libssl-dev
curl --proto '=https' --tlsv1.2 -sSf https://sh.rustup.rs | sh
python3 -m pip install wsproto==1.0.0
pip install cryptography
(or)
sudo apt install python3-cryptography
python3 -m pip install pyWalletConnect

#Take Note Difficulty with installing cryptography module as "sudo", so script has to run through user because sudo doesn't have access
practice from command line:
sudo -E python3 imageid.py

#work around for sudo -E (when running myscript) see below
added sys.path directions directly into the file so it would point to the location installed under the pi user
(all directories need to be listed, if additional modules are found in subfolders those folders need to be named)
Caution when running WalletConnect Wallet all signatures are auto-signed (be careful as any transaction you agree to will be auto signed with no confirmation